Introduction:
When developing Flutter applications, incorporating SVG (Scalable Vector Graphics) files can add visual appeal and flexibility to your UI. However, the standard approach of using the flutter_svg package to render SVG files may result in larger file sizes, potentially impacting app performance. In this article, we will explore an alternative method that allows you to utilize SVGs in Flutter without the need for additional assets. By following the steps outlined below, you can achieve faster, smoother rendering and smaller file sizes for your Flutter projects.
Step 1:

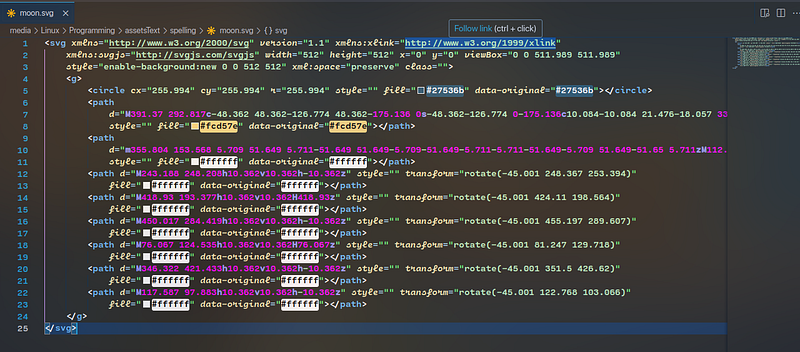
Copy the SVG Code To begin, locate the SVG file you wish to incorporate into your Flutter project. Instead of using the flutter_svg package, we will convert the SVG code directly into Flutter code. Copy the SVG code from your file.
Step 2:
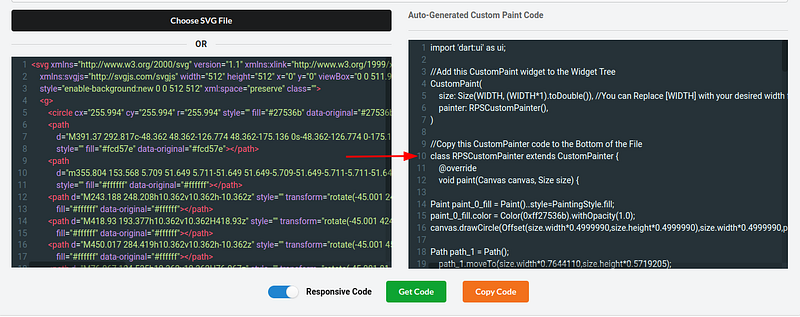
Convert SVG to Flutter Painter Next, visit the website “Flutter Shape Maker” at https://fluttershapemaker.com/. This online tool enables you to convert SVG code into Flutter CustomPainter code, which can be directly used to render the SVG in your Flutter project.

Paste the SVG code into the provided text box on the Flutter Shape Maker website. The tool will automatically generate the corresponding Flutter CustomPainter code based on the SVG. This code will contain the necessary instructions to render the SVG as a visual element in your Flutter UI.
Step 3:
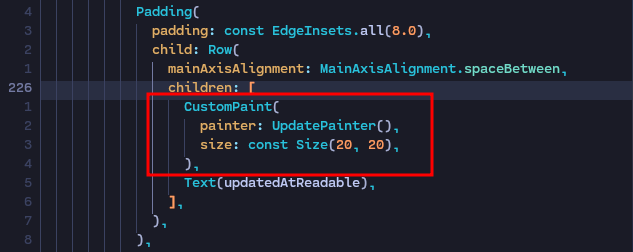
Implement the CustomPainter in Your Flutter Project Now that you have the generated CustomPainter code, you can incorporate it into your Flutter project. Create a new Flutter widget or modify an existing one to include the CustomPaint widget. The CustomPaint widget allows you to draw arbitrary graphics using the provided CustomPainter implementation.

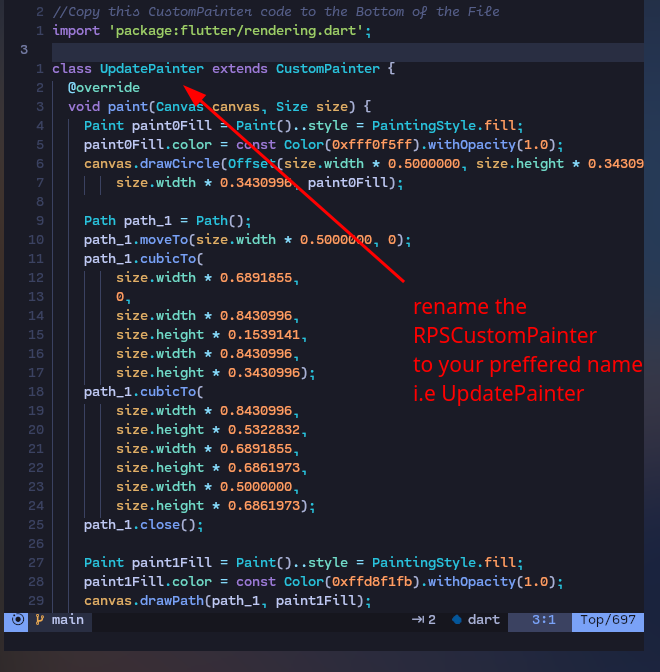
Inside the CustomPaint widget, set the painter property to an instance of the CustomPainter class generated by the Flutter Shape Maker website. This will ensure that the SVG is rendered correctly within your Flutter UI.

Additionally, remember to specify the desired size for the SVG by setting the size property of the CustomPaint widget. This ensures that the SVG is displayed at the intended dimensions within your UI.
Conclusion:
By following the steps outlined above, you can optimize the rendering of SVG files in your Flutter projects. By converting the SVG code into Flutter CustomPainter code using the Flutter Shape Maker website, you can eliminate the need for additional assets and achieve improved performance and smaller file sizes. This approach allows for faster and smoother rendering of SVGs, enhancing the overall user experience of your Flutter applications.
Remember to apply the suggested method the next time you need to incorporate SVGs in your Flutter projects, and enjoy the benefits of optimized SVG rendering.
0 Comments:
Post a Comment